Monday, October 31, 2022

MC-10 to EXORbus adapter

I previously hinted at a hardware project I have been working on- an expansion bus adapter for the MC-10 allowing it to use EXORbus peripheral cards. The idea is pretty absurd as it the MC-10 is a little low-end consumer computer while EXORbus was typically used for pretty advanced industrial PLC or scientific computers. For instance, an EXORbus serial card would be quite expensive and have 8 ACIAs on it, giving you 8 serial ports, an insane amount for the lowly MC-10. My EXORbus Static RAM card has 1 MiB of RAM on it, also an insane amount for this little guy.

Since the EXORbus is made for 6800/6809 processors, and the MC-10's expansion bus is mostly just unbuffered signals from the mostly compatible processor, all we need is a bunch of buffers and connectors and a GAL to do address decoding into the MC-10's memory map. Here is the design I have been working on, yet to be prototyped:

I really wish I could have finished this during Retrochallenge, but I lost momentum with family events and vacations. Next time!

+

Friday, October 14, 2022

Off the MC-10 Wagon

Day 14:

So, I was making good progress doing daily tasks on my MC-10, but lost my momentum after a camping trip. I have been doing minor development and added a new level to my BAM Minesweeper game, but I have been using XRoar emulator instead of the MC-10. Unfortunately, the extra level will not load on my bare-bones MC-10, so I am working on trimming the fat.

Monday, October 10, 2022

BASIC Programming

Days 7-9

I started working on a BASIC game for the MC-10. Previously, I had been able to use the MC's serial port to "LPRINT" any BASIC programs to my Mac. Of course, this did not work anymore, since I had to change the serial cable wiring. So, I had to make a little adapter to make the serial port cable work with the BASIC ROM functions. Very frustrating.

After I got that working I had a decent build chain to write a BASIC game, doing as much of the programming as possible on the MC-10 and saving to my Mac. The line editor for the MC-10 is non-existant, but there are some solutions out there. Still it took a long time for me to write a simple mine-sweeper type game that was based on my TS-1000 efforts in a previous Retrochallenge. As much as I despise the keyboard on the TS-1000, the BASIC implementation is quite good with some conditional printing syntax that is lacking in the traditional MS BASICs. But I enjoyed figuring out how to work around the shortcomings in the MC-10 BASIC. I know there are a number of minesweeper games out there for the MC-10, but they don't seem to work on an unexpanded 4K RAM MC-10. Anyway, I have a working first version that is pretty fun to play. I intend to add a second level before the end of RetroChallenge. I used a few of the tricks that I learned on the TS-1000 to keep memory down. I was also proud of how it only has code for 2 loops - one to loop through the locations on the game board and one to loop through the 8 locations surrounding the current selection. The loops call different subroutines to do the work on each square on the grid based on a preset variable. Probably horrible coding practices, but it kept the number of code intensive for-next loops down to a minimum. Screenshot:

Screenshot of minesweeper type game on TRS-80 MC-10

You can find it on my MC-10 Cassette Server.

Friday, October 7, 2022

Games Day...

Day 6:

I mostly played MC-10 games from Jim Gerrie's TRS-80 MC-10 Files repository. So much stuff in there! Unfortunately Google Drive reports a lot of errors when trying to play the files online. It often forces me to download the cassette audio file which is annoying, but it pretty much works. I played a game "rocket" which is basically an Apollo lunar lander simulator. I spent so much time trying to land and win the game... I finally did it though!

I have to give it up for Jim Gerrie who keeps all of this archived, and ported or wrote many of the games. So much fun, even with 4K of RAM still!

On that note, I have been thinking of the best route to upgrade this little MC-10. There are a lot of good semi-commercial options out there, but I think I will go for something far more ridiculous and excessive. If you follow my blog, you probably have some idea of what I am thinking. I am working out some schematics to figure out the best way to do the upgrade from only the expansion port. Stay tuned!

Wednesday, October 5, 2022

MC-10 Cassette Server is Online!

Day 5:

I spent a fair bit of time today downloading and running TRS-80 MC-10 games and utiliites. Unfortunately, the process was rough:

  1. download the file
  2. extract it from zip archive
  3. load the .c10 file into XRoar
  4. save it to .wav file using XRoar
  5. awkwardly play it in the Mac Music app
  6. organize all the new files

To be fair, many of the zip files already have a .wav format file in there, but it is still not a convenient process. XRoar is esptecially time consuming as the cassette menu controls can be a bit awkward and the conversion is done using MC-10 commands in MC-10 time. There is apparently a Windows utility to do the conversion, but I don't have Windows and it is not open source. Fortunately, I am familiar with the useful c2t utility by datajerk for converting Apple II format files to .wav and .aiff formats. I knew that the MC-10 cassette audio format was vaguely simlar to the Apple II (FM encoding), so I made some changes to make a simple command line tool for converting .c10 files to .wav files. I was so shocked when it worked, I had to double check a few times that I was playing my generated file rather than a comparison file I was using. I just posted the project code on github.

Even with the .c10 format files converted to .wav, I was still struggling with my Mac always importing them into the Music app, or not being able to rewind and start again with the Finder preview. Inspired by the Online Apple II Game Server, I uploaded the .wav files onto Google Drive, and wrote a small web app to organize and display them. So, now I can just hook up my audio cable, go to the MC-10 Cassette Server webpage, and play them right from there. I can even use an iPhone or iPad to connect. I will be adding more files and information there as I test everything.

Comms Day!

Day 4:

I found an MC-10 serial terminal program "COMPAC" online and was able to load it onto the MC-10 using my new 'cassette' interface cable (see part 1 and part 2 of making the cable).

Of course, I could only send letters from the MC-10 to my Mac's terminal program, but not from the Mac to the MC-10. I knew immediately that it was due to the serial cable wiring and how the Tx and CD wires were swapped for printing. I tried to make a little adapter, but it did not work, so I had to re-solder the connector using the orinal pinout in the Service Manual.

Well, it works now! I can type messages back and forth between my computers finally! It's only 300 baud, but it feels like a good success. Oh, in the README for the console program was a link to a 90's awsome MC-10 website on triod. What flashback and a great resource!

Tomorrow I will see if I can access the macOS shell.

screen /dev/cu.usbserial 300,cs7,cstopb

Tuesday, October 4, 2022

Cassette SAVE and LOAD, pt 2

After some research I found out that my MacBook needs a resistor from the sleeve to ground to identify the TRRS jack as having a microphone or audio input. 10k ohm was the highest that still worked reliably. However, it took hours to get everything soldered up nicely. But it works!! I can load and save programs to and from the mac as a virtual cassette recorder for the MC-10.
Pinout:
3.5mm TRRS plug
|   |
-----
  |   = (5) MIC + 10K OHM resistor to ground
  _
  |   = (2) Signal Ground
  _
  |   = (N/C) right EAR
  _
  v   = (4) left EAR or AUX

BASIC after the break...

Cassette SAVE and LOAD, pt 1

So basically, MC-10 can load from Mac, but can't save cassette/audio output to Mac yet. XRoar is converting file formats for me.

MC-10 cassette audio cable looking very much in prototype stage.

Half working audio cable still in development.

BASIC program after the break.

Sunday, October 2, 2022

Printer Day!

TODAY WAS PRINTER DAY! I HOOKED THE MC-10 UP TO AN APPLE IMAGEWRITER. I HAD TO LUBE UP THE PRINTER AND PUT SOME RUBBING ALCOHOL INTO THE RIBBON TO GET IT WORKING. THE MC-10 IS NOT A GOOD MATCH FOR THIS PRINTER. THE MC-10 OUTPUTS AT 600 BAUD  AND THE IMAGEWRITER DOES NOT HAVE A SETTING FOR THAT. BUT THE MC-10 SPEED IS ADJUSTABLE IN MEMORY, THOUGH NOT PUBLISHED. I MADE A BASIC PROGRAM TO INCREMENT THE BIT DELAY UNTIL IT PRINTED AT 300 BAUD. THEN I HAD TO SET LF ON CR ON THE PRINTER SO IT WOULD ADVANCE LINES. YOU CAN SEE IN THE VIDEO THAT THE OLD PRINTER ROLLER DOES  NOT GRIP THE PAPER WELL, SO I HAVE TO HELP IT ALONG A BIT. I AM VERY HAPPY WITH MY PROGRESS FOR TODAY!

BASIC code samples after the break...

Saturday, October 1, 2022

Serial Confusion

Here is the transferred BASIC for this post:

10 CLS 20 PRINT "I MADE AN MC-10 SERIAL CABLE TODAY. FRANKLY, I AM SURPRISED THAT IT WORKED." 30 PRINT "THE RX LINE IS APPARENTLY WRONG IN THE SERVICE MANUAL. OR WRONG IN THE BASIC ROM?" 40 PRINT "ANYWAY, IT IS STRANGE THAT THE SCHEMATIC DOES NOT FOLLOW THE SCI (SERIAL COMMUNICATIONS INTERFACE) OF MC6801 EITHER" 50 PRINT "I CANT FIND AN OFFICIAL SOURCE FOR HOW IT SHOULD BE WIRED BUT IT WORKS FOR SENDING ANYWAY." 55 REM END : REM "END HERE FOR FIRST PAGE" 60 PRINT "SO I CAN TRANSFER MY BASIC PROGRAM TO MY MAIN COMPUTER NOW" 70 PRINT "THE ONLY ISSUE IS THAT IT SENDS WITH CARRIAGE RETURN ONLY AND NOT A LINE FEED." 80 PRINT "EASY ENOUGH TO FIX WITH THE TR COMMAND ON MY MAC." 90 PRINT "HOWEVER THE BASIC ROM DOES NOT HAVE A COMMAND TO LOAD FROM SERIAL PORT. SO I NEED TO MAKE AN AUDIO CABLE STILL." 100 PRINT "A PRINTER WOULD BE NICE TOO..." 110 REM END : REM "END HERE FOR SECOND PAGE" 120 CLS 130 PRINT "QUICK TIP: MAKE SURE THE CONNECTORS ARE PLUGGED INTO A SPARE JACK WHEN SOLDERING TO ENSURE THAT THE PINS DONT MOVE." 140 PRINT "IN THE END, I USED THE PINOUT IN THE ANNOTATED DIAGRAM HERE: 150 LLIST

MC-10 First Impressions...

Between running RetroChallenge and how limited the TRS-80 MC-10 is, a real endurance challenge is not in the cards for me. But I fully intend to use this computer daily, connect to some important peripherals and make some necessary upgrades. I hope the results will be a usable guide for somebody who is just getting started with the Radio Shack Model MC-10 TRS-80 Micro Color Computer. For such a small computer, it has a very long name! So, here we go with my notes so far:

FIRST RC2022/10 POST. INITIAL IMPRESSIONS OF MC-10:
1) WHERE IS LOWERCASE?!; 2) KEYBOARD IS OK. MUCH BETTER THAN TS1000. AND I LIKE THE CTRL KEY BASIC COMMANDS HERE TOO. MISSING A SHIFT KEY; 3) LOTS OF SOFTWARE ONLINE. NEED TO FIGURE  OUT HOW TO GET IT ON HERE; 4) I REALLY DO LIKE THE FORM FACTOR AND AESTHETICS; 5) DISPLAY IS SMALL AND BLURRY. NEED COMPOSITE + 80 COLS
I STARTED BY HOOKING UP THE MONITOR. THE PHONO PLUG ON THE COMPUTER IS FOR RF, NOT COMOSITE VIDEO. SO, YOU NEED AN ADAPTER. 'F  / RCA ADAPTER' WITH CATV CABLE WORKS GREAT. AFTER MAKING SURE THE COMPUTER AND TV WERE SET TO THE SAME CHANNEL, I TURNED ON THE MC-10. I WAS GREETED WITH A MICROSOFT COPYRIGHT ON GREEN BACKGROUND THAT ONLY A COCO USER COULD LOVE.
I HAD TO TURN OFF THE COLOR ON MY MONITOR TO GET A DECENT PICTURE. THE BLACK ON GREEN COLOR WAS FAR TOO BLURRY.IN THE MORNING I WILL BUY SOME MORE SUPPLIES TO MAKE A SERIAL CABLE AND AUDIO CASSETTE STORAGE CABLE.

Friday, September 9, 2022

RetroChallenge 2022/10 Entry

SBCs + Keyboards!! I will figuring out how to interface keyboards with some 6502/6809 SBCs, playing around with PS/2 interfaces, and, if I have time, build my own parallel ascii keyboard.

I will probably be focused on using my 6502 based Synertek MBC020, MC6800 based CMS 9600A, and MIKUL 6218 for its extra RAM and 6522 VIAs. Maybe the Apple II+, too.

Update! Change of plans... I just bought a Radio Shack TRS-80 MC-10 and I am going to spend the month using it, connecting it, and upgrading it!

  • Connect to printer
  • Add some utilities
  • Connect as terminal
  • Expand the RAM
  • HID keyboard?

Sunday, July 24, 2022

SYNERTEK MBC020 Video Output and More RAM

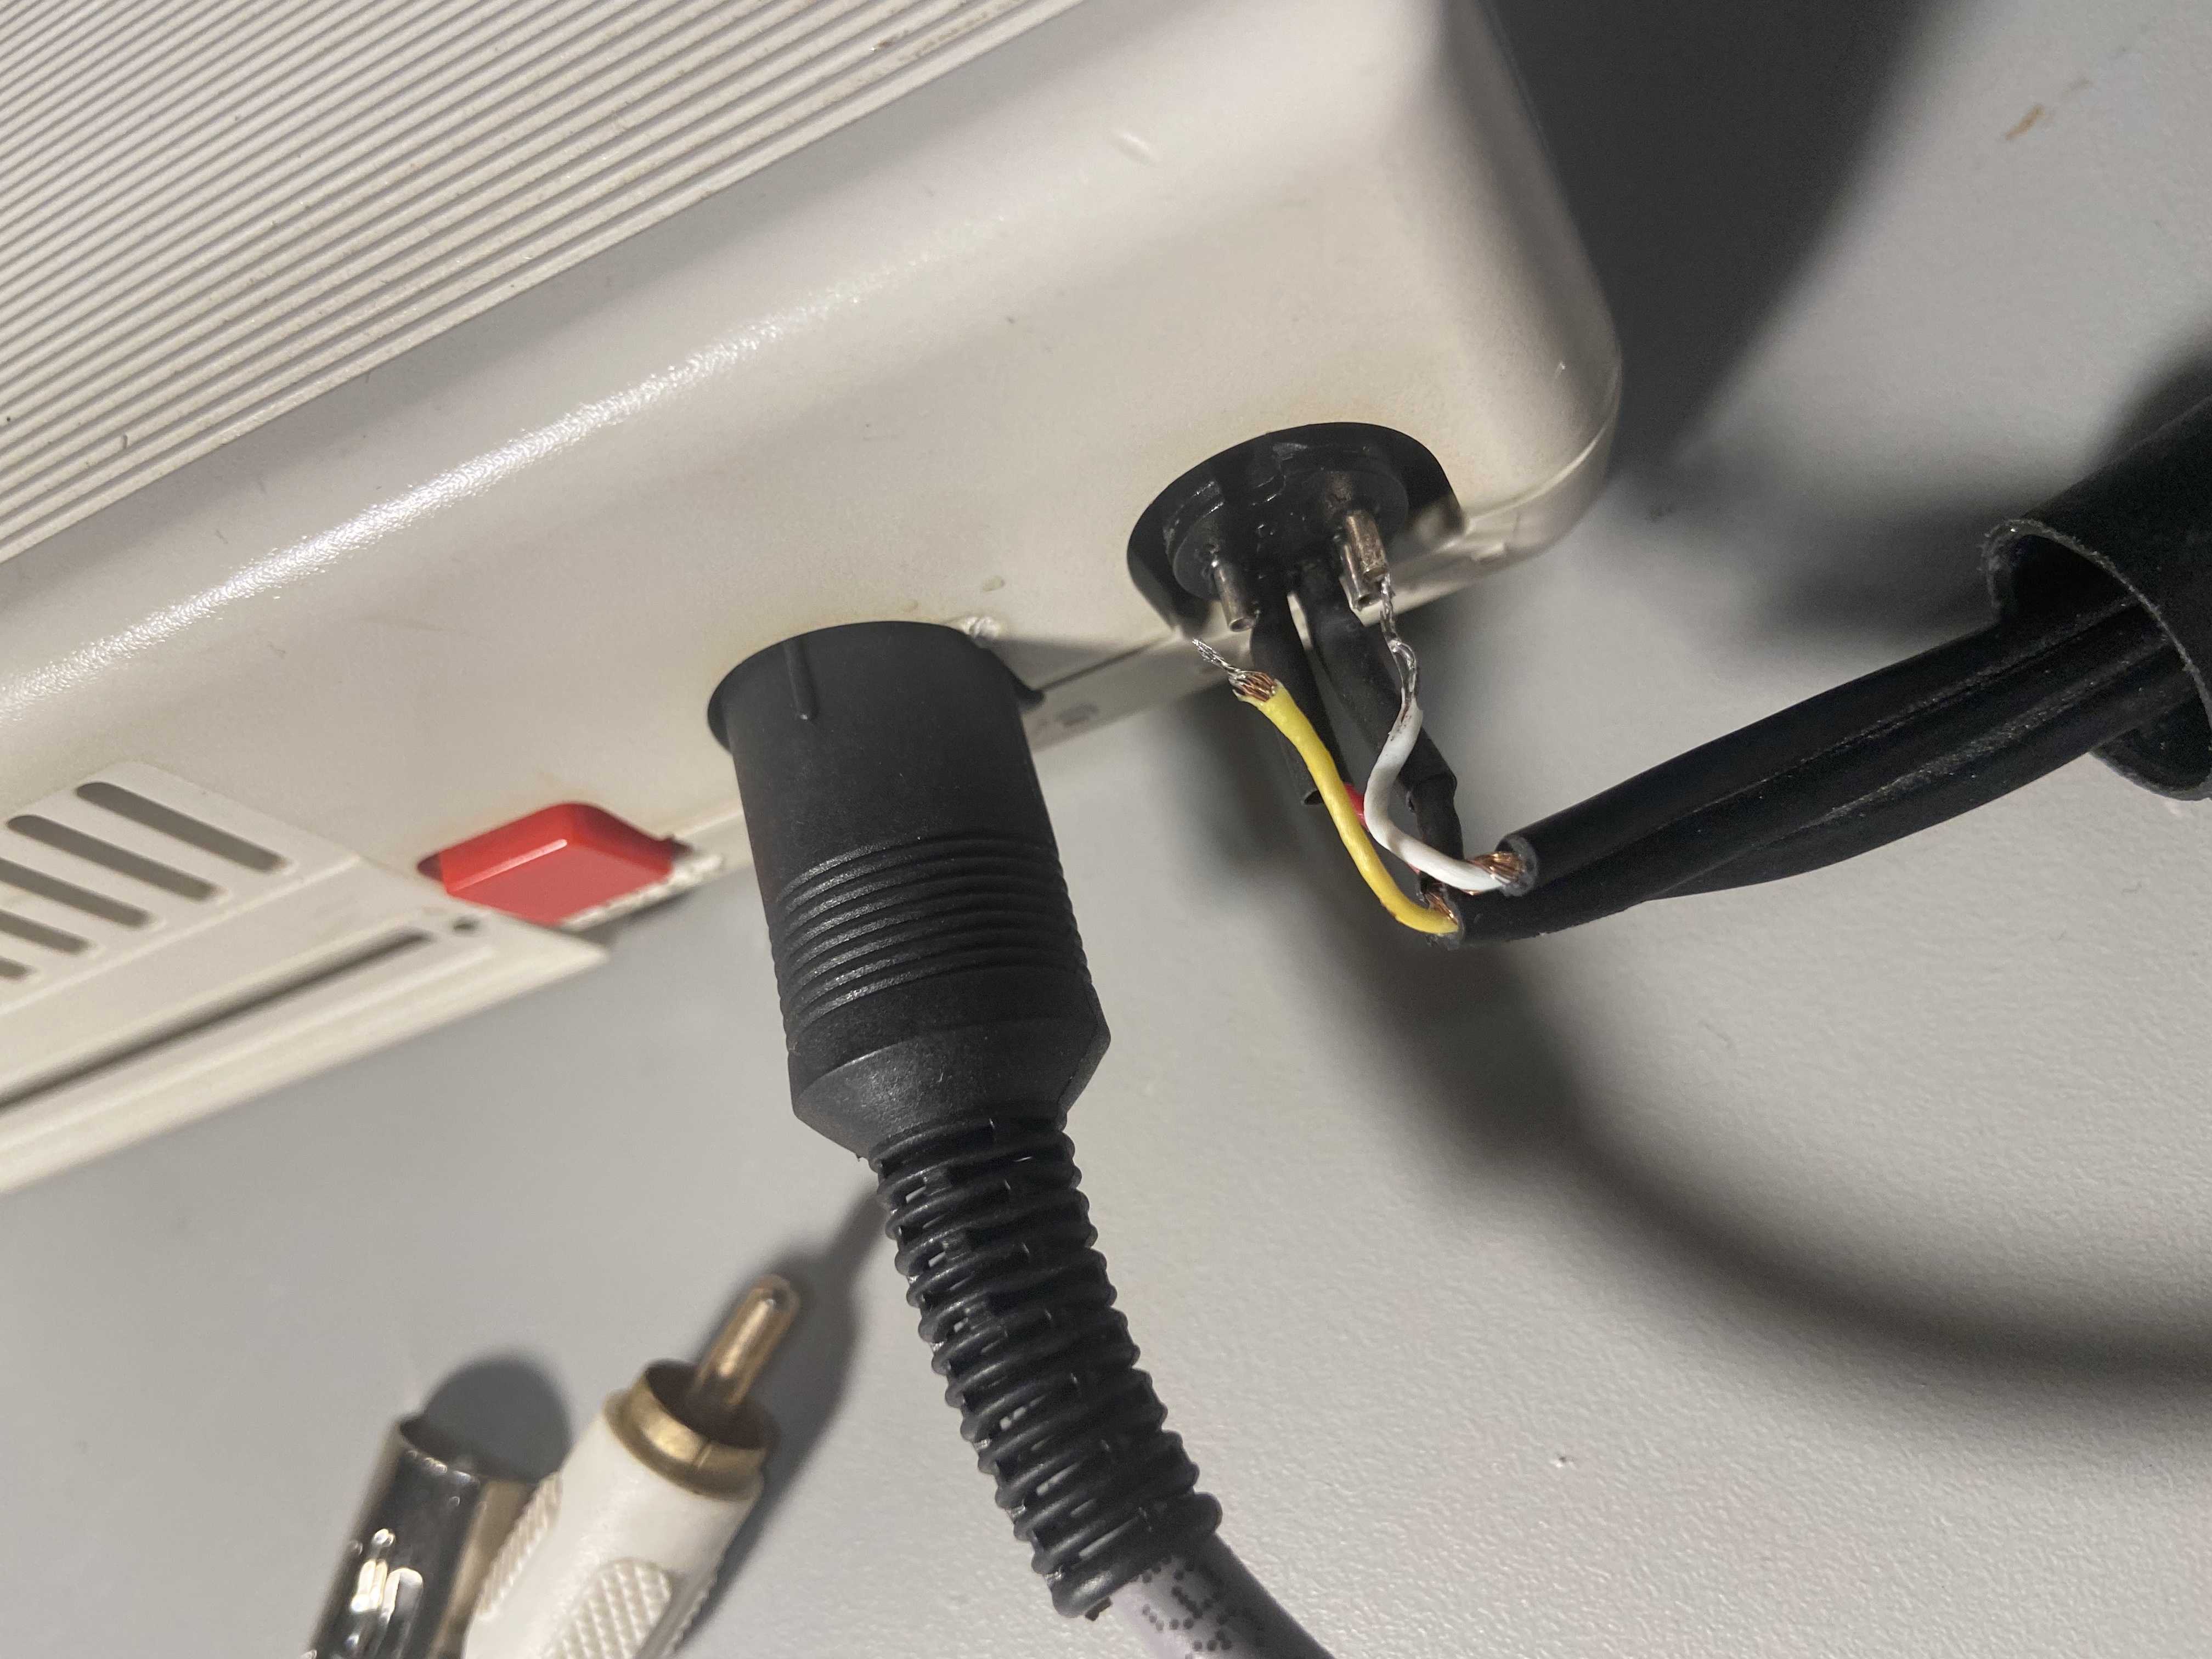
After figuring out the location of the video output on the MBC020's P4 connector (pin 20), I noticed that the video and ground signals are also connected to some large through-hole pads nearby. These may be solder points for a video coax cable, or some sort of connector. thumbnail

I hoped to avoid soldering directly onto the board, so I first tried some "9mm Through-Hole Loop Test Points". These fit nicely in the holes in the board, but I struggled to get them connected to a coax video cable. Withe the added weight of a cable, they pulled out too easily and were generally awkward to solder and secure.

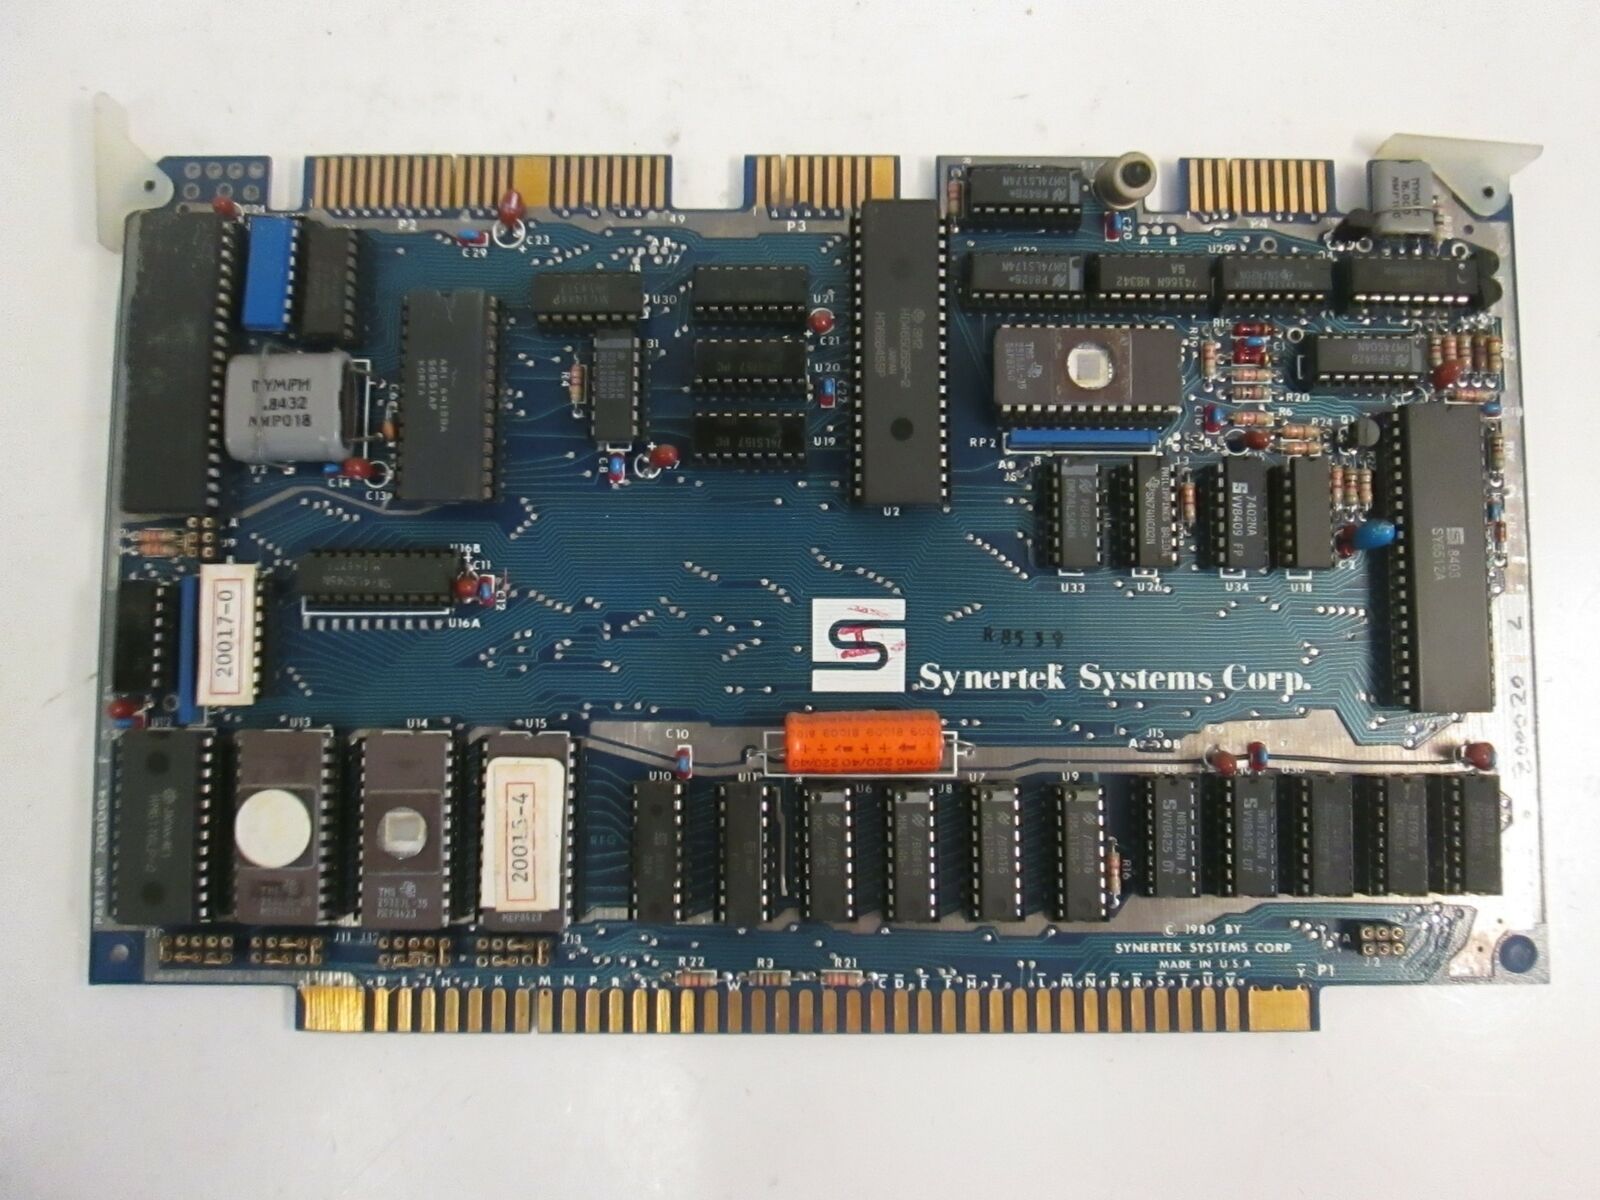
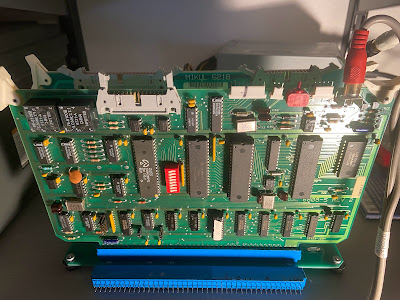
The obvious choice for this was a PCB mount RCA/phono jack for the composite video. Unfortunately, there was just no clearance on the front of the board since an IC and the board ejector interferred with the placement. Only after my failure with the test points did I realize that, after bending up one of the ground legs, there was plenty of space on the back of the board:

PCB mount RCA jack, bent and original RCA jack mounted on back of MBC020

With the RCA/phono jack inserted, I booted it up. The video displays "SE" until the serial connection is made, and then is shows the exact same information as the terminal. Unfortunately, some testing uncovered that the top 1/4-1/2 of the screen has some apparent tearing and sync issues which improve progressively down the screen. The bottom 1/2 of the screen is very clear 80 column output. I am not sure why this is happening, but I would assume it is a damaged component on the board. Moving around the video jack to get a better connection did not improve the video quality. Since this monitor has proven to be compatible with many vintage video devices, if there is a compatibility problem I think it must be the board that is way out of spec.

distorted video output from MBC020

So, video is almost working.

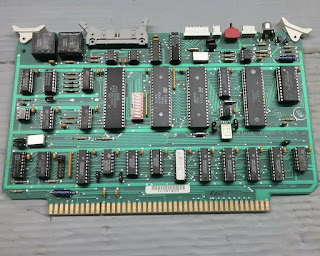
Next, I tried adding the unmodified Mikul 6218 board with extra RAM installed in place of the usual ROMs. Although I did not test the I/O, the RAM addition worked great! Using SERVOMON commands, I was able to edit memory areas that were previously unassigned. This confirms my belief that the Mikul 6218 is a really nice and reasonably priced memory board for a variety of EXORbus systems, especially because the memory sockets are very configurable for a variety of RAM and ROM chips.

Next time I will document the memory map further and check out the keyboard connection to try to make it a complete terminal!

Thursday, June 30, 2022

Synertek MBC020 Serial Snags

Serial Cable

I spent a few minutes continuity testing the P3 card edge connector for the serial port so that I could build a serial cable for the MBC020. I was hopeful that this was just a 1:1 pinout for a card edge to DB-25 RS-232 IDC connector, like one I built for my Motorola MC68000 Educational Computer Board. It is almost exactly right except the send (TxD) and receive (RxD) data lines are swapped. I thought maybe it was wired as a DCE device, but in fact, only the data lines are switched. As annoying as this was, it wasn't too difficult to put a twist in part of the ribbon cable, swapping wires 3 and 5:

Card Edge to DB25 serial cable

Note the twist in the green, yellow, and orange wires near the DB25 connector on the bottom right of the picture.

Serial Output

With the serial cable constructed and a null modem adapter attached, it was time to power it up! I installed the card in my EXORbus "MULTI-PLANE" backplane, and booted it up. Unfortunately, no matter what baud rate I tried, I was only receiving data that looked like a baud rate mismatch. I double checked the MBC020 driver source code in mame to see if it provided any hints, and sure enough, it apparently set 9600 baud, 7 data bits with 2 start bits. This effectively eliminates a high bit 7, as you would also need in the Apple II monitor. However, after apparently configuring GNU screen, it still did not work. Examining a hex dump of the output showed: 00000000: 00d3 c5d2 d6cf cdcf cea0 d6c5 d2a0 b4ae ................ 00000010: b08d 8ac3 cfd0 d9d2 c9c7 c8d4 a0ca d5cc ................ 00000020: adb1 b9b8 b3a0 d4cf d2d1 d5c5 a0d3 d9d3 ................ 00000030: d4c5 cdd3 a0c9 cec3 ae8d 8abe c800 ..............

This appeared to be the data I wanted, but bit 7 was still set high, making the text unreadable. After a quick check of my screen command line parameters, I realized that screen expects the serial options to be comma separated. Duh! The command:
screen -L /dev/cu.usbserial 9600,cs7,cstopb
did the trick perfectly and allowed me to finally interact with the real SERVOMON monitor:
SERVOMON VER 4.0 COPYRIGHT JUL-1983 TORQUE SYSTEMS INC. >V 0000-000F 0000 BF BF 9F BF BF BF 9F BF,B8 0008 9F AF BF BF BF BF BF BF,80 0B80 >F 00,0000-00F >V 0000-000F 0000 00 00 00 00 00 00 00 00,00 0008 00 00 00 00 00 00 00 00,00 0000 >J 1 MPC DIGITAL DRIVE REV 4.0 JUL-1983. AXES FOUND ON-LINE : 4 Ok AUTO ER 00 >G SERVOMON VER 4.0 COPYRIGHT JUL-1983 TORQUE SYSTEMS INC. >

Success! Next I will test out composite video output! Special thanks to "andysa" on the 6502.org Forum for sharing his notes on this board with me.

Wednesday, June 15, 2022

Synertek MBC020

I recently acquired a Synertek MBC020 EXORbus single board computer, notably sporting a 6512 microprocessor. The 6512 is software compatible with the famous MOS 6502 processor used in the Apple ][. This is one step closer to the whole point of this blog! It may at first seem odd that this 6512 board uses the EXORbus card edge which was most commonly associated with Motorola MC6800, MC6802, and MC6809 processors. However, the 6500 family was always intended to be MC6800 bus compatible. In fact, Rockwell even produced an AIM 65 Expansion Motherboard that would allow their AIM 65 computer (which like the Synertek SYM-1, was a derivitive of the famous MOS KIM-1 6502 trainer) to use EXORbus card modules. Synertek also made a clone of the MC6800 based Motorola MicroModule MM01, named the MBC01A2, and various EXORbus RAM and I/O cards.

Any of these ExorBus systems I have seen are either trainers or PLCs (programmable logic controllers) for industrial applications. They appear in knitting machines, industrial ovens, industrial food processing machines, and silicon wafer exposure and inspection stations. Fittingly, the Synertek MBC020 is usually seen configured for use in an "EG&G Torque Systems" servo controller. This is the same configuration for the card I purchased:

The Synertek MBC020 MOS 6512 based Single Board Computer

In a strange stroke of luck, this board happens to be available in the MAME emulator (formerly:"Multiple Arcade Machine Emulator"). I'm not sure why an industrial controller would be included in a emulator focused on arcade and console video games. Anyway, the ROMs available online appear to be the same as my own, so it is nice that I can see what I should be expecting when booting the board. Once I compiled MAME and added the ROMs, I was greeted with:

After a bit of trying out different key combinations, I discovered that the commands are predictably very similar to the SYM-1's SUPERMON monitor. Here is an incomplete summary:

SERVOMON COMMANDS: [] is optional parameter, $ is a hex digit (0-9,A-F)
Command and FormatDescription
M [[$$,]$$$$[-$$$$]]MEM: Memory examine, modify, [search,] hex data editor starting at address [-end]
R REG: Examine and modify user registers PC,S,F,A,X,Y
G [$$$$]GO: Restore all user registers [except PC=address, S=FD] and resume execution.
V [$$$$[-$$$$]]VER: View/Verify display data and checkums [starting at address [-to end]]
D [$$$$]DEP: Deposit hex data to memory [starting address]
C [$$,]$$$$[-$$$$]CALC: Calculate two's complement [-displacement], with [,offset]
B $$$$,$$$$-$$$$BMOV: Move data to address, from start -to end
J $JUMP: Restore user registers, except PC=listed entry in jump table, S=FD, and jump to it
J 1 MPC DIGITAL DRIVE REV 4.0 JUL-1983.
AXES FOUND ONLINE : 1
Ok
SD $$$$-$$$$SDBL: Store double byte from address -to address
F $$,$$$$-$$$$FILL: Fill data, from memory address -to address
S1 [$$$$]Save ASCII data to memory [starting address].

Next post: let's try out the real board!

Sunday, June 5, 2022

MIKUL 1MiB Mods (final)

It did not take long for me to realize that the virtual address jumper board for my MIKUL 6218 was not a great long-term soloution. It was ugly and was not very physically secure with jumper wires running everywhere. Instead, I decided to remove the jumper board and add a 2*5 pin header to the top of the memory board, where it belonged. As a result, I would need to program a GAL to go back in place of the jumper board, handling the conversion from virtual to physical addresses. Since I now have a working GAL programming pipeline, this was no longer a serious impediment.

Header

Adding the pin header was a simple matter of drilling holes in the board in a .10" grid, supergluing a 2*5 male header (with latch) to the board, adding some copper tape connected to ground, and soldering on jumper wires connecting to the A16-A20 address lines. Although I would have preferred to use some mounting screws on the header, both of the mounting holes ended up right on top of VCC traces.

GAL Program

With the board soldered up, I had some initial success using it with my CMS 9639 and Microware OS9 Level 2. However, I soon noticed that there was a block of memory that was not being identified at $C000-$DFFF every 64K. This is an odd range of addresses to have a problem with, since it can't be attributed to bad connections on an address line or two. I quickly identified that the GAL in U10 will disable the RAM and enable the I/O in that range, regardless of the state of the high virtual address lines. Although this is fine for the MIKUL 6809-5 board it was designed for, it is not consistent with the CMS9639's expectation that I/O is only enabled in the $00FF60-$00FF9F address range. So, I had to reprogram the U10 GAL and make some adjustments to the program in the U13 GAL to get everything working properly.

Conclusion

Here is the final product, a relatively clean looking 1 MiB EXORBus RAM and 3xVIA I/O card working great with the CMS 9619 and OS9 Level 2 on the CMS 9639:

Sunday, March 27, 2022

MIKUL 6809-5 Keypad

I received some membrane keypads in the mail today. Unfortunately, I neglected to order the 4x5 Keypads I hoped to use and only ordered 4x4 and (accidentally) 3x4 keypads. No problem. The 4x4 keypad will work fine to navigate the menus, with: * as clear; # as enter; D as Main Menu. You can't quite set the clock though because it is missing the keys to select year/month/day as they are on the missing row.

Here is the pinout, which requires a small jumper board to connect to either a 4x4 or 5x4 keypad, as the P3 header is not arranged in a very logical way:

  MIKUL 6809-5        eBay    |   Alltronics
   P3 HEADER       4x4 Keypad |   5x4 Keypad
        ___ 
COL1   |1     ->   3 - ROW3   |   6 - ROW3
ROW1  ||2     ->   5 - COL1   |   5 - COL3
COL2  ||3     ->   2 - ROW2   |   2 - ROW2				
ROW2  ||4     ->   6 - COL2   |   7 - COL4
ROW3  ||5     ->   7 - COL3   |   9 - COL5
ROW4  ||6     ->   x - N/C    |   3 - COL2
COL3  ||7     ->   1 - ROW1   |   8 - ROW1
ROW5  ||8     ->   8 - COL4   |   1 - COL1
COL4   |9     ->   4 - ROW4   |   4 - ROW4
       |___      

I think these are the orignial keypads that came with the TEMPMATE and CASEMATE firmware (pics from various auction sites):

Unfortunately, I think the cheap ebay 4x5 keypads I hoped to use will not work because they have 5 rows when the MIKUL's TEMPMATE software is written to use a keypad with 5 columns.

I found a keypad at Alltronics that has the right layout for only a few dollars. That keypad only has the flat flexible cable without a PCB connector, so I had to source that too. Also, it does not have the nice clicky metal domes in it so it feels mushy, but it works, and I can finally set the clock!:

Saturday, March 19, 2022

MIKUL 6809-5 Memory Map

By using the HCF instruction and a cheap logic analyzer, I was able to make a memory map of the MIKUL 6809-5:


External
 
FFFF


MEMORY OR I/O

EC00
EXTERNAL I/0 EBFF
EB10
U21 6821 PIA EB00-EB0F
EXTERNAL I/0 EAFF
EA10
U20 SIO/2 EA00-EA0F
U25 VRAM

MEMORY?
E9FF


E800

External
E7FF


MEMORY


0000

Of course, this lines up well with the MIKUL 6218 memory and VIA board. I need to update that memory map using the HCF technique.

Reverse Engineering MC6809 SBC... The Easy Way!

I previously documented my ultimately successful attempt to reverse engineer the CMS 9619 Advanced Single Board Computer. The main goal was to get a memory map of the system, including I/O addresses. Having this memory map makes disassembling the firmware on these boards much easier. The process I used prevously was labor intensive, and required me to:

  1. figure out what each of the pins on the PAL IC (that decodes the addresses) connects to;
  2. lookup datasheets to see if it is an input or output pin;
  3. build a small circuit to increment through all of the possible inputs;
  4. write a program to display all of the actual outputs for those inputs.
This took a lot of work and most of it is will only apply to the particular address decoder I was working on.

Ideally, I would want to just keep everything connected in circuit and just have the processor increment through all of the address lines for me, like a 16 bit binary counter. Hmm... Fortunately, the MC6809 has just such a feature built in! The "HCF" (Halt and Catch Fire!) instruction will halt the processor and increment the MC6809 address lines while holding R/W' high, causing it to output every possible address, and select every I/O chip on the board. This is perfect to build a memory map. Even better, since just one instruction does all of this, all I need to do is wire up that one instruction on the data bus and let the processor do the rest. I don't even need to program an EEPROM! Then, I can just observe the addresses and I/O enable lines using a cheap (under $10) logic analyzer. I could even use an Apple II (or another 6809 SBC) with a MC6821 PIA (or MC6522 VIA) to track the signal changes.

In the end, I decided to just program an EEPROM with a lot of HCF instructions: % touch HCF.bin % os9 padrom -c=205 8192 ./HCF.bin % minipro -p AT28C64 -w ./HCF.bin % xxd -s $((16#1FF0)) ./HCF.bin

00001ff0: cdcd cdcd cdcd cdcd cdcd cdcd cdcd cdcd
and I used my cheap logic analyzer to check the addresses and the chip select pins on the various I/O ICs on the board. Although this took a couple of steps (A15-A9 addresses, then A8-A2 addresses, before settling on A11-A8 with 4 chip select lines), I think it was probably faster than building a cable to connect to the Apple II APIO (MC6821) card, and I am pretty sure the Apple II could not have polled the lines fast enough.
Note channels 3-7 (A11-A7)incrementing nicely with HCF instruction

Wednesday, March 16, 2022

MIKUL 6809-5 Processor and Video Board

I recently procured another EXORbus processor board, the MIKUL 6809-5, for a reasonable price. Let's take a look...

Notable ICs:

  • Motorola MC6809 processor
  • MC6821 Peripheral Interface Adapter (PIA)
  • MC6847 Video Display Generator (VDG)
  • Z0844206 SERIAL INPUT/OUTPUT CONTROLLER (SIO/2)
  • MM74C923 20 Key Keyboard Encoder

Ports:

  1. EXORbus card edge
  2. RS232 and RS485 / multidrop LAN port?
  3. 20 key matrix keypad
  4. LED indicator ?
  5. video output
  6. composite video

It is interesting that the board uses the MC6809 CPU with a MC6847 VDG like the Radio Shack Color Computer (CoCo). Unike the CoCo, it does not have an MC6883 SAM, making it similar to the Radio Shack TRS-80 MC-10 (which uses an MC6803, rather than the MC6809). So the basic CPU and video chipset places it somewhere between those two computers.

Notably, the board does not have any provision for ROM or application RAM on it. As a result, it needs another memory board on the bus to function properly. The MIKUL 6218 would make a perfect companion for it, but I already modified my 6218 board to work with the my CMS processor boards...whoops. So, with the price of these MIKUL boards dropping due to an apparent glut of them, I picked up a fresh MIKUL 6218 for ~$35 and installed them both in my EXORbus MULTI-PLANE backplane.

Despite the interesting video output, I am not in love with the features. The MC6821 PIA is dedicated to running the keypad encoder and baud rate dip switches, so it can't be used for much. Really the MIKUL 6809-4 or 6809-6 (Motorola MicroModule clone?) would be a better choice as a all-in-one SBC. However, the 6809-5s are definitely more pentiful and far cheaper right now, so maybe somebody else can make use of any info I publish about it.

More details below...