My SuperProto card arrived this weekend from the Russian Federation. I plan to modify it for the foundation of my KIM-2e card. The SuperProto is designed to use the MOS 6522 VIA and a separate ROM. The KIM-1 has MOS 6530 RRIOT ICs with integrated mask ROM. Since these are no longer available, several KIM-1 enthusiasts have replaced it with a MOS 6532 RIOT and separate ROM chip. The 6532 RIOT has a pinout that is fairly similar to the 6522 VIA. So, by switching some pins around, I can get a 6532 functioning on the SuperProto card, which already has a spot for the ROM chip.
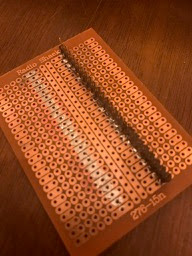
Rather than cut up the beautiful SuperProto card, I am working on an adapter that will plug into the 40 pin socket on the card. Fortunately, it really doesn't matter how the pins are ordered on one side of the adapter since they just hook up to the prototyping area on the card, and I can connect to them however I want there. I started with a standard Radio Shack style multipurpose PCB and added male to male Round PCB pin headers. The pins are thinner than standard headers, so that they do not damage the chip socket on the main card. It was difficult to solder these on the copper side of the board. My first attempt left me with bridged pins which I struggled to fix with solder braid, and I ended up melting the plastic. It was just too hard to get the soldering iron and solder under the plastic while regulating the amount of solder going in. Then I realized I had put the long header on the wrong side of the board and had to start over anyway, ugh... I took some time to diagram out the copper side of the board so that I knew exactly where everything had to go. I had better luck pre-tinning the PCB holes and then hitting each pin base with the iron with a bit of solder on the tip. Gravity pulled the solder down to the pin, and I had good control of how much solder was going in.


I pushed the tips of the socket legs to the left or right to bridge the gap to the next hole, depending on whether I wanted a connection to the headers, or not. The adapter is almost done, but it sits too low on the card for my taste. I probably should have swapped the locations of the socket and headers, but the address lines would have been difficult to re-route. I will probably need to cut the edge off the adapter to clear the mother board of the Apple IIe. Anyway, making progress...


I also took a few minutes to test out the keypad and re-route a few traces. I caught a missed connection, and managed to eliminate a long jumper that I did not like. So, way too much soldering so far, and much more to come.

No comments:
Post a Comment