Tuesday, April 2, 2019

RC 2019/03 finale

With just one weekend left of RetroChallenge 2019, it was becoming clear that I was running out of time. Only extraordinary luck would allow me to complete my KIM-1 simulator for the Apple IIe by the end of the month. Unfortunately, that luck never came. I finished most of the soldering and installed my KIM-2e card (without the 6532 or adapter) into my un-enhanced Apple IIe, only to have the computer not boot. It was clearly related to the card, and after a bit of trouble shooting (removing ICs), I realized that I had pulled the outputs of the KIM's 75LS145 secondary address decoder low instead of high. As a result, the card was always asserting /INHIBIT, leaving the Apple IIe without access to ROM or RAM. Some jumper rearranging fixed the problem, but now I could not get the card to ever inhibit.

The small BASIC program listed below should be putting some data into memory, then activating the card and checking the memory. The retrieved value should be different from the value that was set since there should be nothing on the data bus when my card is activated (because the 6532 is not installed).

Unfortunately, the values are the same. I broke out my cheap USB oscilloscope to see what was going on.

The initial flip-flop is being set properly, and all of the addresses leading to the 74LS138 address decoder are giving good signals, but the decoder is never activating the output to enable the 74LS145 secondary encoder. I tried different ICs and bench tested the chips to make sure they were good, but no luck when installed. Basically, I think either:

  1. Using A12 as a negative enable signal for the decoder was a bad idea, and I am trying to operate out of spec.
  2. The signal is actually correct, but so brief that my oscilloscope is not picking it up, and something else is wrong.

Either way, I had too much going on this weekend to give this my best effort and had to be content with the card not causing my computer to catch on fire. I suppose it is a good start, considering this is my first Apple II card, but I think I have a lot more work to do to get this operating successfully.

Tuesday, March 26, 2019

Solder On! and KIM-2e Addressing

I wish I had fun things to report, but I am just doing tons of point to point soldering on the SUPERPROTO card, and the Keypad/LED main board.

Keypad/LED main board

In the meantime, I can describe some of the theory behind how the KIM-IIe card should work (click below to see the gorey details).

Friday, March 15, 2019

KIM-2e Half Time Update

Here is the halftime status for my RetroChallenge 2019/03 project "KIM-2e" a KIM-1 simulator for the Apple //e . To review, I am using Mike Willegal's SUPERPROTO card as a foundation for my project. I am adapting it to use the MOS 6532 RIOT, rather than the MOS 6522 VIA. I don't have a GAL programmer, so I am using my own logic (basically from the KIM-1 schematic) to decode everything. The system will use the Apple //e's inhibit function to keep the Apple's RAM off the data bus at the location the KIM-1 would expect to find the 6532. I am also building a keypad and display that is functionally the same as the KIM-1's. Of course, this is all just an exercise in entertainment since the Apple //e already has an excellent keyboard and display, and an easy to use system monitor. But the end result should be an Apple II that can run binaries for the KIM-1, unaltered and in their full glory. So, I will finally get to use my Apple //e to play Farmer Brown on a 7 segment LED display as it was intended!

It took a while to get my LED modules assembled. I ran into a few problems with the new pinout. mostly, the transistor legs are so skinny that they fall right out of the sockets if a resistor leg is in there. The jumpers helped wedge them in the socket, but order of operations was important, and the jumpers had to go in last. Here is my display BusBoard assembled, with most of the soldering complete.
On the main peripheral card, the adapter board for the MOS 6532 is complete, and hopefully functional. Some of the ICs are installed and wired up. I still need to add some more glue logic ICs and the header to connect to the keypad. I do not think I will have time to deal with the ROM. Instead I will just load the KIM-1 ROM into the Apple II RAM at the correct address.
I still have a lot of wiring to do here! I had a new idea on how to do some of the address decoding for a little more granularity, so there are some jumpers that I am in the process of moving. It is getting messy! On retrospect, the ICs could have been laid out a little differently for shorter address lines.

And finally, here is the mock-up of how the interface will look with the keypad and display board in the bottom half of the enclosure. Next, I need to solder in the header for the connector to the peripheral card and the socket for the display board, and add the decoder and buffer ICs on the bottom proto-board.

I will likely post a schematic of everything at the end of the month, but it is still undergoing so many changes as I go that I don't want to post anything yet. In the meantime, you can follow my status on this project at my RetroChallenge_2019/03 blog pages.

Tuesday, March 12, 2019

LED Module Mayhem

New Module Diagram

I had some time to test out my LED modules, only to discover that the pinout I used was not correct. I assumed the common anode was on pins 1 and 6 based on some spec sheets I found. This made it convenient to wire up as a module since there is an anode close to the top to connect with the transistor leg. Unfortunately, I discovered that the actual pinout has the common anode on pins 3 and 8 (see diagram). As a result, I have to rebuild all of my modules with new sockets, and figure out a way to run a jumper to the middle of the LED without interfering with the adjacent modules.

I also made a diagram of how the modules will connect to the back of the BusBoard. I always get confused soldering everything backwards unless I have a diagram. Unfortunately, after I had already cut a few of the traces, I realized that I put VCC (+5V power) on pin 1 instead of pin 16 where it usually is. I guess that is not too big of a deal though, so I am just keeping it as-is. The current-limiting resistors from the buffer start from under the adjacent LED so I have room for them to lay down on the board.

LED Board Diagram
Black = male header on the copper side;
Grey = LED module / socket on the board side;
Yellow = jumpers; Red = cut traces

Finally, I just received some 6x8mm proto-boards to be the main board for the LED BusBoard and the keyboard to mount on. They fit nicely into a Serpac handheld enclosure that I found a while back at my local electronics surplus store.

Monday, March 11, 2019

Adapter Armageddon

I finished soldering up my adapter board this weekend and cut off 2 unused rows to save space, but quickly realized that I need to make some changes. The SuperProto card routes the 6522's positive chip enable (CE) signal directly to VCC to always keep it active. I need to fix this because this signal needs to be controlled by my own logic. The negative chip enable (CE) is connected to DEV_SEL on the Apple II bus. This also has to be fixed as it will be connected to the Kim-1's K5 signal from the address decoder. I didn't handle these properly in the adapter and just connected them to the corresponding signal from the SuperProto card. I can either cut the lines on the card, or change the adapter card. I modified the adapter card and updated the diagram.

I also spent some time soldering in sockets for the ICs and connecting the address lines to the decoder ICs. I am running a lot more wires than I expected!

Thursday, March 7, 2019

LED Displays - Makin' Modules

The common anode 7 segment LEDs arrived from China yesterday, so I started assembling some modules that include the resistors and transistor necessary for each display. My plan is to mount these on a zig-zag Busboard to easily connect all of the pins for each segment, without a bunch of jumper wires.

My LEDs are smaller than the originals with a different pinout. Since I can't find the exact data sheet for them online, I need to do some experimentation before I solder anything in. As I was working, I noticed 5 pins of the modules that should not be connected to the bus. Rather than cut traces between each module, I just broke the legs off of the sockets. I can use those bus lines to carry the signals that select each display, instead.

Tuesday, March 5, 2019

KIM-2e MOS 6530 - 6532 - 6522 plan of attack

My SuperProto card arrived this weekend from the Russian Federation. I plan to modify it for the foundation of my KIM-2e card. The SuperProto is designed to use the MOS 6522 VIA and a separate ROM. The KIM-1 has MOS 6530 RRIOT ICs with integrated mask ROM. Since these are no longer available, several KIM-1 enthusiasts have replaced it with a MOS 6532 RIOT and separate ROM chip. The 6532 RIOT has a pinout that is fairly similar to the 6522 VIA. So, by switching some pins around, I can get a 6532 functioning on the SuperProto card, which already has a spot for the ROM chip.

Rather than cut up the beautiful SuperProto card, I am working on an adapter that will plug into the 40 pin socket on the card. Fortunately, it really doesn't matter how the pins are ordered on one side of the adapter since they just hook up to the prototyping area on the card, and I can connect to them however I want there. I started with a standard Radio Shack style multipurpose PCB and added male to male Round PCB pin headers. The pins are thinner than standard headers, so that they do not damage the chip socket on the main card. It was difficult to solder these on the copper side of the board. My first attempt left me with bridged pins which I struggled to fix with solder braid, and I ended up melting the plastic. It was just too hard to get the soldering iron and solder under the plastic while regulating the amount of solder going in. Then I realized I had put the long header on the wrong side of the board and had to start over anyway, ugh... I took some time to diagram out the copper side of the board so that I knew exactly where everything had to go. I had better luck pre-tinning the PCB holes and then hitting each pin base with the iron with a bit of solder on the tip. Gravity pulled the solder down to the pin, and I had good control of how much solder was going in.
pre-tinned holes

I pushed the tips of the socket legs to the left or right to bridge the gap to the next hole, depending on whether I wanted a connection to the headers, or not. The adapter is almost done, but it sits too low on the card for my taste. I probably should have swapped the locations of the socket and headers, but the address lines would have been difficult to re-route. I will probably need to cut the edge off the adapter to clear the mother board of the Apple IIe. Anyway, making progress...
half completed adapter

I also took a few minutes to test out the keypad and re-route a few traces. I caught a missed connection, and managed to eliminate a long jumper that I did not like. So, way too much soldering so far, and much more to come.
updated keypad

Sunday, March 3, 2019

Keypad Chaos

Since I didn't think I would have time to build the keypad or display, obviously I had to spend the weekend making a keypad. The SuperProto card I ordered from the Russian Federation hadn't arrived by Friday, so I thought this would be an easy start to the month. The layout is a bit strange (3x7 matrix, arranged as 4x5, plus the RS and ST keys) , so a normal keypad matrix won't work. I used the newer Kim-1 key layout with the SST switch on the left, and retained the same header pinout, so it should theoretically plug right into a KIM-1.


Of course, it took forever to route all of the wires by trial and error. Anyway, it's done (other than the step buttons), and it seems like it will work... but I need to get some decals so I know what key I am typing!

...and the SuperProto card finally arrived this weekend, just in time!

Wednesday, February 13, 2019

RetroChallenge 2019/03

RetroChallenge Updates:

Check out all of my RetroChallenge 2019/03 posts and updates.


RetroChallenge Goals:

Apple IIe Kim-1 Simulator (Kim-2e ?) Summary

I am really excited to finally get to do some work on an Apple IIe KIM-1 simulator. I don't have the money or space for a KIM-1, so this is as close as I am going to get. The end goal will be to have something that can run unmodified KIM-1 software. This will be tricky due to the conflicting address spaces between a KIM-1 and Apple II.
It will basically be a MOS 6532 RIOT IC on an Apple II peripheral card with some logic to enable it at the proper address locations. I will need to use an Apple IIe so that I can disable the built-in RAM at the addresses that KIM-1 software would expect the 6532. This RAM inhibit feature is not available on the Apple II+. I was considering including a ROM, but it will be easier to load the KIM-1 ROM data in Apple II RAM at the correct address. We will see how that works out. I am also considering using Mike Willegal's SuperProto card as a base for this project since the pinouts of the 6532 and 6522 are fairly close.
I don't think I will have time to build the keypad and display, but I may be able to add an RS232 circuit for user input.
Growing collection of Apple II and KIM-1 prototyping parts. 


Friday, December 14, 2018

ESP32 internet modem with PPPD and secure Contiki webbrowser

I have been working on a internet modem for the ESP32 that can be used with a wide variety of computers, some more retro than others. Here are some expected use cases:

  • Apple II without TCP/IP connects with a VT52 or VT100 terminal.
  • Old Macintosh with TCP/IP stack, but no ethernet card, connects with PPP.

Basically, since the ESP32 is so cheap, it is much more affordable than a dedicated Raspberry Pi + interface card. One of the big issues is connecting to the modern web with SSL and complicated web pages. Although connecting to a computer running Lynx is certainly feasible, I was looking for something more lightweight. So, here is a sample of some of the applications:

Webbrowser

AT+WEB=<URL>

Above is a screen shot of Virtual ][ (an Apple II emulator) running DCOM 3.3 (a VT100 terminal emulator) connected the esp32 contiki webbrowser. This setup can be used to connect an Apple II to the internet.


And this is the same browser running in the Mac terminal. In the lower right, you can see the Mac has a terminal window that is connected to the ESP32 and showing a https secure web page. The HTML is parsed by the Contiki webbrowser, which I modified to use the ESP32 web client that includes SSL encryption. The ANSI/VT100 colors are added by my Contiki console i/o module that detects the VT terminal type.

PPPd

AT+PPPD

For computers with TCP/IP stacks, but no ethernet card, use the PPPD command, making a serial TCP/IP connection, so all your existing internet programs will work:

Telnet

AT+CIPSTART=<IP Address>

Of course, since it uses the standard ESP32 AT commands, you can do all the normal connections to telnet-based BBSs.

Some of the code is on my GitHub page, with more to come!

Tuesday, November 13, 2018

Using the Apple II as a 28C16 EEPROM Burner

This is a tutorial on how to use an Apple II with a Super Serial Card as a 28C16 EEPROM programmer. For the purposes of this tutorial, I will be giving instructions on programming a lowercase character ROM for the Apple II+ Rev 7. You can use an earlier Apple II for general EEPROM programming though. The simplest way to transfer the data from a binary file to the EEPROM without extra hardware is to use the Mac's headphone port connected to the Apple II Cassette input port, and that method is what I will demonstrate here. Alternatively, you could use a virtual disk, TCP/IP card, or another Super Serial Card to transfer the data to the Apple II.

Supplies:

  • Apple II+ Rev 7 (minimum to accept the finished lowercase character ROM)
  • Apple Super Serial Card (SSC)
  • Atmel 28C16 EEPROM
  • ROM binary file
  • Macintosh running OS X

Process:

Install c2t on your Mac
c2t will convert a binary file to the audio format that the Apple II can use. You can find instructions to install on the c2t GitHub page. However, due to an HTML redirect and a typo, some of the instructions did not work correctly for meThe instructions are now correct, and I had to use the Terminal commands:
sudo curl -L https://github.com/datajerk/c2t/raw/master/bin/c2t >/usr/local/bin/c2t
sudo chmod 755 /usr/local/bin/c2t
Get and convert the ROM binary file to audio format

Apple ROM files are fairly easy to find. Once the archive is downloaded to your Downloads folder, extract the files and convert to audio using the Terminal commands:

open ~/Downloads/APPLE+II+ROMS.zip
cd ~/Downloads/APPLE\ II\ ROMS/APPLE\ II+/
c2t -2 APPLE\ II+\ -\ LOWERCASE\ CHARACTER\ GENERATOR\ -\ 2716.bin,8000 ~/Downloads/LOWERCASE_ROM.aif

This creates an audio file in your Downloads folder named "LOWERCASE_ROM.aif", which can be used to transfer the ROM data to your Apple II. This audio file is available for download, if you want to skip installing c2t.
Modify the Super Serial Card

The Apple SSC manual documents how to modify the card to accept an SRAM chip, which is compatible with the pinout of a 28C16 EEPROM. I have a clone of the SSC which is slightly different and will allow me to easily enable and disable this function.

First, I removed the ROM (the lower big chip) so I didn't accidentally damage it. Then, I cut the traces that link the some of the vias in the center of the card, and removed the solder in the vias.

These vias correspond to the bow-ties and solder pads on the SSC card. I soldered in gold and silver double row header pins so I can easily see which pins should be jumped at the same time.

If you have an SSC, card just cut the bowties and solder across the jumper pads, according to the instructions in the manual. Note that you will have to undo this modification to use the original SSC ROM

With the pins soldered in, I can use jumpers to configure the card for the original ROM, for EEPROM, and to set the write enable separately for the EEPROM (black jumper cap).

Now, install the 28C16 EEPROM into the ROM location (double check the orientation of the EEPROM chip!) and insert the card into slot 2 of the Apple II.

Connect the Computers
Use a 3.5mm Male to Male Audio Aux Cable to connect the Mac headphone jack to the Apple II Cassette Input port. The cable can can be stereo or mono, although stereo is easier to find nowadays. Turn the Mac volume up to the maximum level.
Transfer and Write the ROM Data

It would be really simple if we could just transfer the audio data directly into the memory locations of the EEPROM. Unfortunately, I was unable to do this. I believe that the EEPROM needs more time to write than is given to it by the Apple II Monitor, so maybe the faster AT28C16E would work better for direct writing. I could only successfully write about 16 bytes at a time reading audio or copying directly to the AT28C16.

Instead, we will copy to the Apple II memory, then slowly POKE it into the EEPROM using AppleSoft BASIC. On the Apple II, assuming 64K of RAM:

] CALL -151
* 8000.87FFR

Play the LOWERCASE_ROM.aif file on your Mac. When it is loaded, you should hear a beep on the Apple II, and get another * prompt.

At this point, you could try directly copying to the EEPROM by:

* CFFF
* C200
* C800<8000.86FFM
* C200<8700.87FFM
But, I received errors when verifying:
* C200<8700.87FFV

So, if that doesn't work, let's load an AppleSoft BASIC program to get the data into the EEPROM. To load it, return to BASIC by hitting:

<CTRL><RESET>
Enter the BASIC command:
] LOAD
Then use the Mac to download and play the audio file for the ROM transfer BASIC program or, skip the LOAD command and enter it by hand:

5 REM ?"TRANSFER BIN FROM $8000 TO SSC CARD"
10 S = 2 : REM ?"SLOT 2, DO NOT USE 0, 1, 3" 
20 LM = 49152 + (S*256) : REM ?"SLOT IOSEL"
30 HM = 51200 : REM ?"$C800"
40 ST = 32768 : REM ?"$8000"
50 X=PEEK(53247) : REM ?"$CFFF"
60 X=PEEK(LM) : REM ?"ENABLE HM"
70 BL = 1792 : REM ?"IOSEL SIZE"
80 LM=LM-BL
100 FOR X= 0 TO 2047
110 V= PEEK(ST+X)
120 IF X < BL THEN EA = (HM+X) : GOTO 140
130 EA = (LM+X)
140 POKE EA,V
150 ? EA; ": ";V
160 NEXT X
170 ? "TRANSFERRED ";X;" BYTES" 
200 END
After the beeps, run the loaded BASIC program:
] RUN
This will slowly write the data you previously stored in the $8000 memory range to the I/O shared $C800.$CEFF range, and the slot 2 $C200.$C2FF range. The process should take less than 2 minutes (1 min 45 secs). You can edit the BASIC program to change slots if you need to, but don't use slot 1 on any Apple, or slot 3 on an Apple //e, as the IOSEL area we are using is not normally addressable in those slots.

Once the program runs, turn off the Apple II, remove the EEPROM and insert it into the "ROM_SPCL" location at the bottom of the logic board (double check the orientation of the EEPROM chip!). You will normally have to disassemble the computer case to reach down there.

Monday, November 5, 2018

64K 4164 DRAM Decoding Integration

I integrated the 4164 DRAM decoder wiring into the logic board this weekend. It was very difficult to troubleshoot, and on retrospect, I think an adapter board would have been easier and less problematic. The main hangup was that the A14 signal to pin 10 of the J1 socket is connected on both sides of the logic board. One side in from expansion slot 7, and the other side goes out to H1 socket which creates the (A14&A15) signal. I had routed the (A14&A15) back to the J1 socket to decode the upper 16K of RAM. After disconnecting the A14 line from pin 10 and re-connecting pin 10 to a new video decoder signal (HIRES&PAGE2), the video decoder signal was getting sent through to H1 to give (HIRES&PAGE2&A15), which is wrong and caused computer to not be able to access the ROM.

Anyway, I fixed the problems and 74ls153 now sits in the J1 socket like it was always supposed to be there. The signals to decode the upper 16K of memory in the 4164 DRAMs are now available. I need to build circuit with registers to set to enable the upper bank and bank switch the 4K that overlaps the I/O area of the Apple II+. It will basically be 1/2 of an Apple 16K RAM/Language card.

Tuesday, April 24, 2018

PPP server on ESP32

I spent some time working on my Wimos Lolin ESP32 this weekend. I recently wrote up a simple how-to about the ESP32 device on my other blog. Since I am pretty familiar with lwIP and PPP based on my work on the Macintosh 128k webserver, I also previously contributed a small amount of code to enable the PPP server in the lwip network stack that the ESP32 uses. But, without an interface to access the PPP server code, it was useless. So, I decided to integrate access to the PPP server into the ESP32's standard AT command interpreter. With a small amount of code, I think I have it working! My MacBook can connect to itself using PPP now. I need to get one of my classic macs set up to further test the connection. I should get code posted in the next few days.

Update!

Source and instructions are now on github!

Wednesday, April 18, 2018

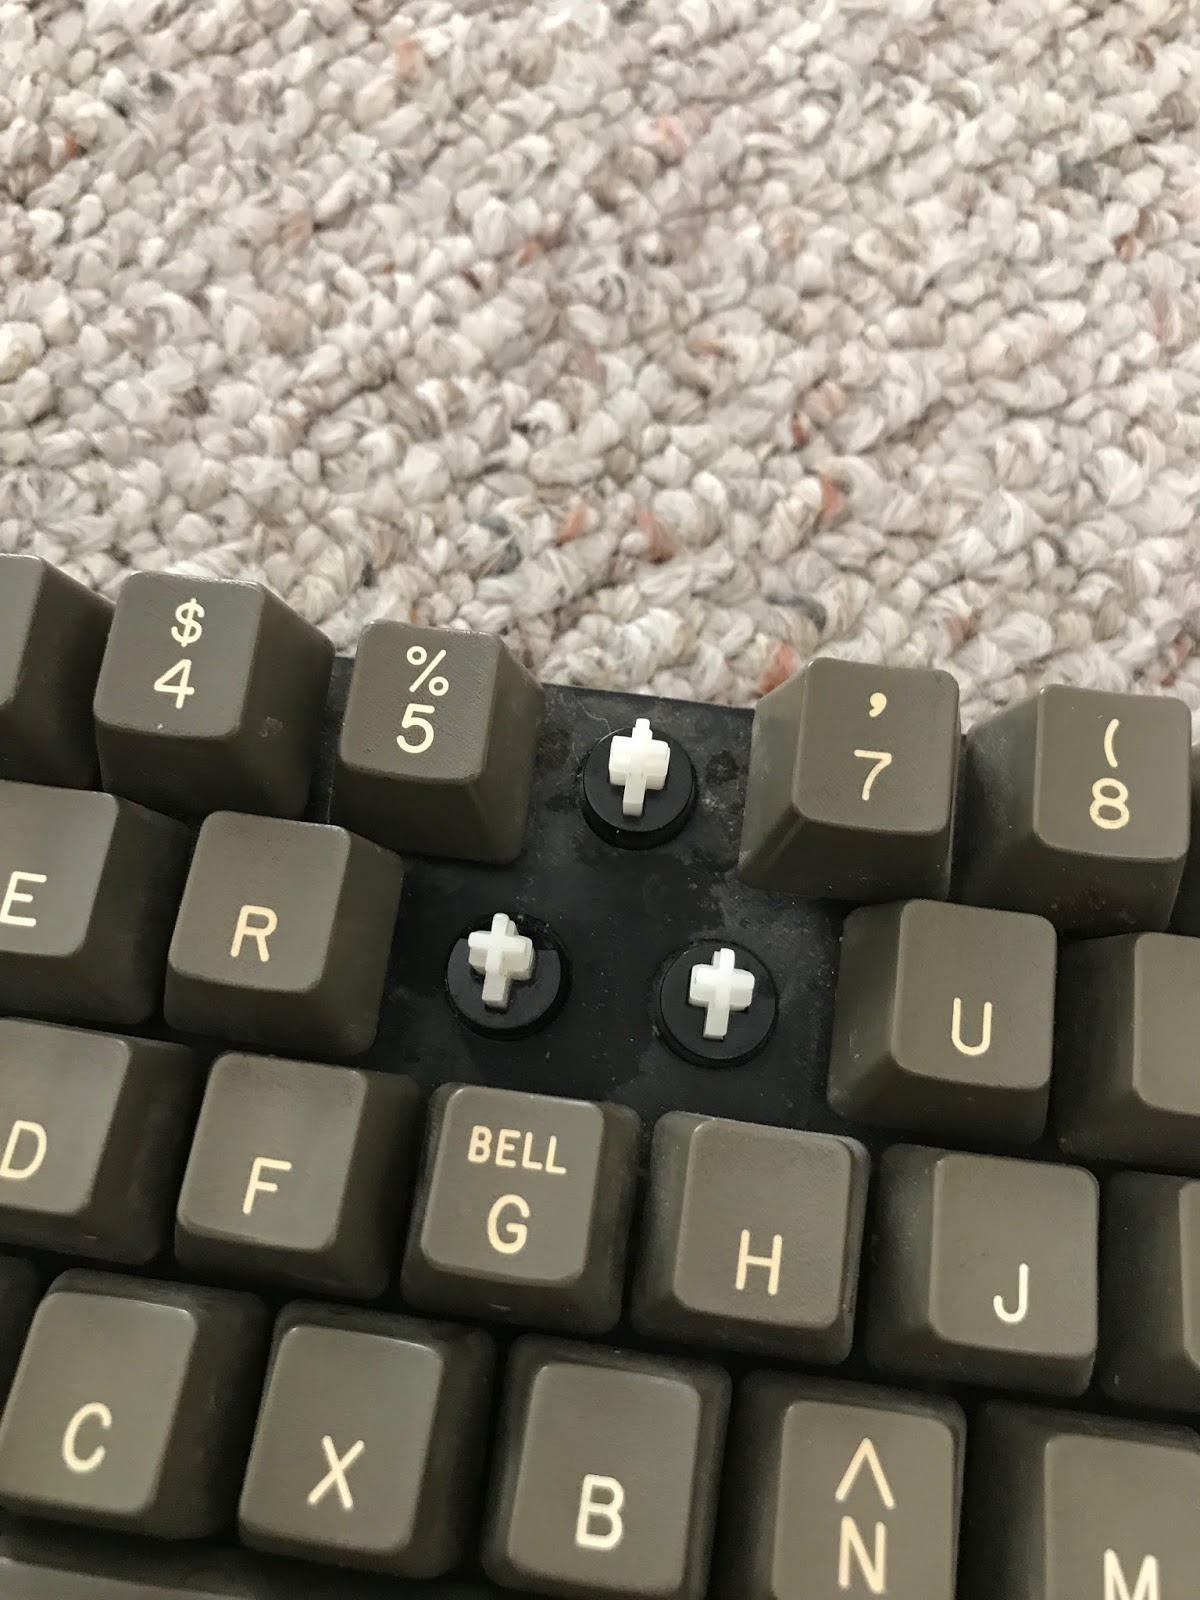
Apple II "The Keyboard Company" Keyboard Repair

During my recent move, one of my Apple II+ computers didn't fare so well and broke 2 key posts. I really don't like the keyboard in this particular computer: it sticks, it often misses key strokes, and the feel is not very good. I didn't know how different the keyboard was until I took it apart and found... no Alps key switches! But, since Apple II+ keyboards are not cheap, I paid a few bucks for replacement key posts instead of replacing the keyboard. Process:

  1. Unscrew and remove the base plate of the computer
  2. Unscrew and remove keyboard
  3. Unscrew a bunch of tiny screws to remove the circuit board from the keyboard
  4. Push the broken post out the back
  5. Push in the new post
  6. Reassemble
  7. Continue hating how the keyboard feels

One repair completed!


Weird spring / contact matrix
I tried to repair the posts, and the one on the left worked OK, but I ended up replacing both of them.
6 and T are fixed!

Wednesday, April 11, 2018

Retro Loft Progress

One of my big RetroChallenge goals was to get my office organized after recently moving. However, I decided to just move everything to a storage loft in the house and add a workstation to get everything out of the way.

I spent last week working on a sketch of what it would look like and this past weekend doing some construction:

RetroLoft - Desk Area SketchUp
RetroLoft - SketchUp
RetroLoft  - Before
RetroLoft - Before
RetroLoft - In Progress
RetroLoft - During
RetroLoft - Desk Area

I installed a hand rail, moved the storage shelves over, installed a desk support, and more storage shelves. I used some old shelf standards I had on-hand and discovered that shelf standards are not 'standard'. The two sets had slots that were not quite aligned the same way. I still need to install the desk surface (an old interior slab door), then run a new power line, and set up some old computers. Its a little warm up there, but a large fan in the garage keeps the air moving now.

Monday, April 2, 2018

Parts!

Lots of parts have come in for RetroChallenge.

Tuesday, March 13, 2018

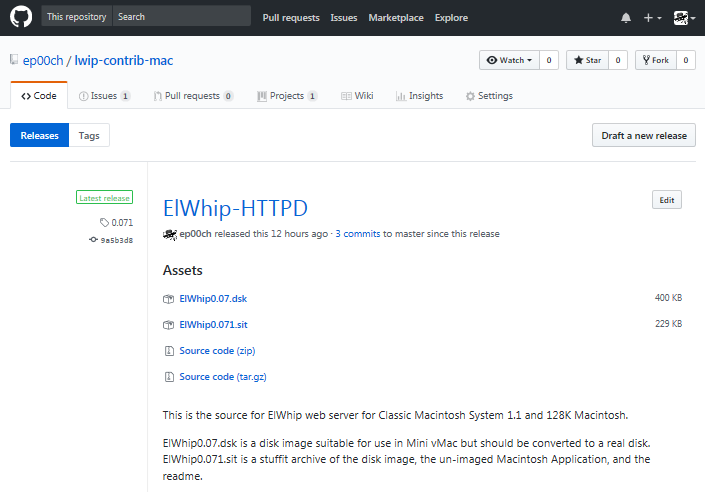
ElWhip is on GitHub

I uploaded my source code for ElWhip onto GitHub. Unfortunately, there are still some files that have Macintosh line endings, so some of the code can't really be viewed on GitHub unless you hit the "Raw" button. Hopefully it will inspire somebody to make a web browser for the original Macintosh. It will also make updates and additions to the code easier for me. Now that it is uploaded, it should make adding a log/status window quite a bit easier.

Tuesday, March 6, 2018

RetroChallenge 2018/04 entry!

It is that time of year again, again! RetroChallenge!

My objectives, by priority:

  1. Organize my office with old computers and identify stuff to eliminate.
    • Give away/sell computers that don't fit with my retrocomputing goals.
    • Set up an imaging machine and get all of my 800K and 1.4M disks transferred to images on Zip Disks
    • Sort through 400K disks
  2. Repair some damaged Apple II+ parts.
  3. Get ElWhip source code uploaded to GitHub.
  4. Test out an ESP32 (new version of ESP8266) as an internet modem / PPP server for old Macintoshes.
  5. Test out an ESP32 as virtual serial port for Apple II.
  6. Add SmartPort compatibility into a2usbdsk.

Thursday, January 11, 2018

a2usbdsk mostly working on Raspberry Pi!

After much experimenting, I figured out that an unusually low usb timeout setting was causing usb transfers to stall on the Raspberry Pi. After I raised that, I was able to easily load disk images! Unfortunately, Karateka does not work. During the boot sequence, Karateka does a very quick jump from track 7 to about track 27. It is cycling the Disk ][ phase lines very quickly to make this happen. Unfortunately, I don't think the Raspberry Pi Zero is currently able to sample the USB data fast enough to keep up. As a result, it is only jumping to track 15 or so. I was having a similar problem in earlier versions of a2usbdsk. I tried some tricks to speed things up, to no avail. But, good news is:


MOONPATROL!

So, as a proof of concept this is looking good. I should be able to move on to step 2 and get this running on the Raspberry Pi's native SPI port.

Tuesday, January 9, 2018

a2usbdsk not working on Raspberry Pi yet

Although my Apple IIe Platinum was not working correctly, I remembered that the color pattern I was seeing was actually a self-test mode that the Enhanced Apple IIe goes into without a keyboard connected. My keyboard was connected, but was also shattered and seriously damaged. Fortunately, another Apple IIe keyboard saved the day.

Unfortunately, a2usbdsk on the Raspberry Pi is not able to send data fast enough for the Apple IIe to read... yet. I have some code optimizations I need to test out which I think may help the situation. That said, even my old MacBook air was barely able to keep up. My newer 1.8 GHz dual-core Intel Core i5 MacBook Air seems to have no problem. I'll keep trying this weekend.

Update!

The Raspberry Pi is able to keep up! The problem is that the FT232H is stalling very often. I had this problem early on in the development of a2usbdsk on Mac OS X, but I worked around it by writing most of my own read/write loops and avoiding libmpsse for the most part. There must be some difference in how libusb or libftdi is handling the packets on the two operating systems. By frequently purging the buffers, I was able to get a disk to load! Need to find a better solution though. More testing should narrow down the problem.

Thursday, January 4, 2018

a2usbdsk ported to Raspberry Pi

I was able to port a2usbdsk to the Raspberry Pi quite easily due to it being based on libusb and libftdi. Really, I just had to set up a makefile. I had some issues getting it to open the FT232H though. libmpsse does not return any errors when attempting to open an FTDI device. This makes troubleshooting very difficult and frustrating. After adding some logging, I determined that the libftdi function ftdi_usb_open_desc_index() was returning error code -8, "get product description failed". Getting the product description is a pretty simple function and that error was not appearing on Mac OS X, so it left me baffled for a while. In the end, the issue was that Raspberry Pi/Linux strictly controls who can access USB devices. "sudo" got it running, but setting up a udev rule seems to be a better solution.

I have not tested this with a real Apple II yet, as my Platinum Apple //e was pretty much destroyed in a recent car accident due to air bag deployment. The case is shattered, but it may still work. I'll try this weekend.

Monday, January 1, 2018

Raspberry Pi A2-SPI-DSK

I received my first Raspberry Pi in the mail today. It is a Raspberry Pi Zero W. I am excited to really try it out. I have it running, but I need to get a USB keyboard and mouse hooked up to get everything installed.

The Raspberry Pi is pretty neat hardware that bridges the gap between a micro controller and a full desktop computer. I have done some micro controller development, but never got really engaged with it. Development on the Raspberry Pi looks a little more my speed. At $10 for the Raspberry Pi Zero W, it is significantly more powerful and cheaper than the Mega AVR Arduinos and the necessary add-on cards. Most of the cool stuff is already built in to the Pi!

So, my hope was to port a2usbdsk to Raspberry Pi, so that people never have to use 5.25" disks again. I love the nostalgia, but they are cumbersome to use and ADTpro transfers to and from the Apple II are fairly slow. Don't get me wrong, ADTpro is a wonderful piece of software that I have used and quite a bit myself. But if you don't want to actually use disks to use disk images on your Apple II, it seems like the wrong solution, and a piece that is missing in (and could easily supplement) other packages like Ivan Drucker's RASPPLE II.

To pull this off, I am going to attempt it in 2 steps:

  1. Port a2usbdsk to Raspberry Pi to run the FT232H adapter;
  2. Create a new program a2spidsk to run on the native SPI ports on the Raspberry Pi.

I am very concerned that the Raspberry Pi may not be able to analyze the incoming data fast enough from the USB adapter. There is quite a bit of latency between transmissions to the disk drive that I was barely able to overcome on my MacBook. This puts a long gap between sectors which the Apple II is pretty good about ignoring, but it will eventually give an I/O error.

I am also concerned that the SPI buffer for the bcm2708 in the Raspberry Pi is quite small (12-120 bytes) which could make it difficult to output the bytes fast enough and with the regularity needed by the Disk ][ interface card. Since the Disk ][ interface card doesn't really understand SPI, we need very regular SPI clock transitions and data to keep synced up with the card in order to match up the synchronous SPI bus to the asynchronous Disk ][ interface card connection.

Tuesday, December 19, 2017

Demo Video of a2usbdsk in a Apple II build and deployment pipeline

The build pipeline is an update of Jeremy Rand’s Apple2BuildPipline based on Quinn Dunki’s project of the same name. Using this allowed me to stop reinventing the wheel and focus on finishing coding my a2usbdsk tool. Definitely check those projects!

Retro redux: a2usbdsk Release

RetroChallenge 2017/10 is way over and I got sidetracked about half-way through. Way too much IRL stuff got in the way. However, I have had a little bit of time recently to try and finish off my project. Upon reviewing my A2-SPI-DSK tool, I noticed some problems in my code. It was causing some serious issues with getting it to compile and work correctly. I guess that’s one of the issues with trying to write that much code in a month.

Anyway I’ve had some time recently to get things working, and completed the a2usbdsk v1.5 tool (Download). It now works perfectly to get a virtual disk to a real Apple II via USB. In addition, I added support for a second drive. I was so happy to see it boot a disk again! It is still read-only, but I have some ideas for that issue.

So, if you are developing Apple II software, you can write it in Xcode with cc65, then when you build it, just add a line to your makefile like: /usr/local/bin/a2usbdsk -1 $(PGM).dsk

This will mount the disk image and make it available to your Apple II over USB via the A2-USB-DSK. The A2-USB-DSK is easy to build using the schematics below and a CJMCU-232H FT232H module available on eBay for less than $10. Total build including the other ICs and a proto-board should be in the $20 range.

I created a branch of Jeremy Rand's Apple2BuildPipeline project to showcase how it works in a real project. Hopefully I can get a video up in the next few days.

Thursday, October 12, 2017

DSKalyzer doubts

Hmm,I have been playing with DSKalyzer, and as great and as powerful as it appears to be for organizing your disk images, I don't think it can create a new one. That is sort of important for making a clean build for a new program. AppleCommander can do that nicely though. I may just stick with AppleCommander in my a2bdp Apple 2 build/deployment pipeline for now. It will make my project a little easier, too.

Tuesday, October 10, 2017

Some AII-SPI-USB problems resolved

I was having some serious issues getting my AII-SPI-USB command line tool (for transferring disk images to the UM232H) working on my newer MacBook. I tried rebuilding it, then rebuilding libftdi, and libusb, and libmpsse. I finally got things working and Xcode asked me to update my build settings. Then, of course, nothing would work again. The primary problem was "duplicate symbol" errors that were suddenly popping up. Some edits to libmpsse, and some changes to my code, and I finally was able to re-build it. I think I should staticly link the libraries I need for the tool, since most users won't have the will power to compile libftdi, or libusb to use it.

I need a new name for the program too. AII-SPI-USB is not a very posixy name for a command line tool. Maybe a2usbdsk.

It's ironic that one of the benefits of programming for retro computers is that the hardware or operating systems almost never change. Do it once, and it works forever! Not so for modern hardware, even the modern hardware interacting with the retro computer.

More AII-SPI-DSK problems

Found my AII-SPI-DSK adapter on the breadboard. Unfortunately, the counter was harvested off of it for some other project. Now I need to track down a 74LS161 ic...

Monday, October 9, 2017

AII-SPI-DSK problems

I downloaded my AII-SPI-DSK program and tried to get it running without success. First FTDI library version errors, then a file not found error. I need to get the adapter out and try again. Unfortunately, it is packed away since I am moving this month. But I think I should be able to dig it out today.

Saturday, October 7, 2017

Trying Existing Virtual Build Pipeline

To get started building an Apple II program, I used some existing resources to make sure my installation of cc65 compiler is configured correctly. Two resources: The BLONDIEHACKS web site conveniently provides an example Apple II build Xcode project to start from. Unfortunately, I had some build errors. The solution is to edit the example's Makefile to specify cc65 assembly configuration: @PATH=$(PATH):/usr/local/bin; $(CL65) -t apple2enh -C apple2enh-asm.cfg -l$(PGM).lst --start-addr $(ADDR) $(PGM).s

Yay! Seizure inducing flashing X's in Virtual II Apple II emulator (the example code is really supposed to do that).

So, the example build process now works with an emulator. Now to incorporate DSKalyzer and a real Apple II.

A2BP .011

Minor update. It is pretty cool to watch this thing run from a clean install. Lots of scrolling text!
  • adds help, clean
  • sets apple2 as the default system for cc65 samples
  • more variables
make is very picky about white spaces. If you copy from browser, it may convert the tabs to multiple spaces. I will set up a download link, once I am happy with everything. # # Makefile # A2BP .011 # # This downloads and installs the pieces for the A2BP # toolchain, build pipeline, and deployment pipeline # for the Apple II on OSX. # # Created by Eric Pooch on 10/05/17. # https://apple-crapple.blogspot.com # # Usage: # make all # sudo make install # PGM=a2bp help : $(info Instructions: Place makefile in a folder with no spaces in path.) $(info then type:) $(info make all) $(info [packages will be downloaded, expanded, and compiled]) $(info sudo make install) $(info [packages will be installed, overwriting existing]) $(PGM) : cc65 dskalyzer USB_AII_Disk_Emulator install-$(PGM) : cc65 dskalyzer USB_AII_Disk_Emulator make --directory=cc65 install MAKE="make PREFIX=/usr/local SYS=apple2" ditto dskalyzer /usr/local/bin/ ditto USB_AII_Disk_Emulator/AII-SPI-DSK /usr/local/bin/ USB_AII_Disk_Emulator.tgz : curl -L -O https://sites.google.com/site/maclcdproc/downloads/USB_AII_Disk_Emulator.tgz USB_AII_Disk_Emulator : USB_AII_Disk_Emulator.tgz tar zxvf USB_AII_Disk_Emulator.tgz dskalyzer-macos-amd64.zip : curl -L -O https://github.com/paleotronic/dskalyzer/releases/download/v0.1.3/dskalyzer-macos-amd64.zip dskalyzer : dskalyzer-macos-amd64.zip tar zxvf dskalyzer-macos-amd64.zip # dskalyzer is older than the archive, so update touch dskalyzer cc65 : git clone https://github.com/cc65/cc65.git make all --directory=cc65 all: $(PGM) install: install-$(PGM) clean: rm -rf cc65 rm -f dskalyzer-macos-amd64.zip rm -f dskalyzer rm -f LICENSE rm -f *md rm -f USB_AII_Disk_Emulator.tgz rm -rf USB_AII_Disk_Emulator So, now that I built my build/deployment environment. It's time to write a program!

Friday, October 6, 2017

A2BP - The OSX to Apple II build and deployment pipeline

I spent some time last night getting all of the pieces assembled for my OSX to Apple II toolchain and build / deployment pipeline ("A2BP"). The plan is to cross-compile using Xcode and cc65, send to disk image using dskalyzer, then load the disk image and transfer to the Apple II using my USB_AII_Disk_Emulator. ANSI C code to running on Apple II hardware with the press of a button! My initial thought was to create a makefile for my first "Hello World" program. But I thought it would be helpful to create a make file for A2BP first. I'm sure that I am grossly abusing make with this thing, but it is pretty helpful. So, here is my first shot at it, after the break:

Tuesday, October 3, 2017

RetroChallenge 2017/10 Entry

I have so many projects in my head, but I haven't had any time to work on them lately. I have a lot of IRL stuff going on, so I want to keep my RetroChallenge entry very simple. I have wanted to get the 6502 cross-assembler cc65 up and running on my MacBook so I can do some Apple II programming in ANSI C. But, I would really like to get a great build pipe-line up and running before I really start programming. BlondieHacks has a good build pipeline that I can use as a starting point. But I want to make some modifications to better suit my needs: This should allow me to test any software on real hardware as part of the makefile build process. So, goals are:
  1. Set up automatic build and deployment pipeline from Mac OSX to real Apple II hardware.
  2. "Hello World" on Apple II
Monday, July 31, 2017

Disk II Drive to USB Adapter

My CJMCU FT232H Module arrived today! Less than $10 for a FTDI FT232H break-out board / USB to SPI adapter. Really excited as it makes my AII-SPI-DSK even cheaper. In addition, I started thinking about an adapter that will allow me to rip Apple II disks right from a Disk II 5.25" drive! I haven't tested anything yet, but it should be fairly easy to implement. It is basically backwards data flow from my previous adapter.